Friday, March 21, 2014

Registration Information


Farm Fusion --- This class is for ages 5-8, but contact me, as exceptions can be made.  A snack-time/lunch-time will be included, and will be held during our storytime & discussion.  It is important to me to keep class size small!  If needed, I will add a second Farm Fusion class to accommodate additional students.  (If this happens, all parents will be given a choice between the two class times.)


Shakespeare For Kids Workshops --- (one per semester) for students ages 10-12.  Each of these workshops will work through a different play.  We will be analyzing the work, as well as working on a group project for each workshop.  The purpose of this class is not only to have a better understanding of Shakespeare, but to also plan, create, and present a collaborative project.  This class will be held in two 5 week workshops. 


In addition to these classes, I will also be hosting holiday parties that are open to all current and former students.   If you would like to be included on the email list for these parties, please just let me know!  


Wednesdays

(This schedule is tentative, and will most likely change before registration begins!)


WEDNESDAYS


12:00-2:30


 Farm Fusion (Max 10 Students)
FIVE 4-Week Workshops - $450/yr
Ages 5-8 (flexible)
Includes all supplies + shirt
These are new workshops,
and do NOT repeat those from
2013-2014 year


**A second farm fusion class will be added on Wednesday mornings if needed to accommodate additional students.  If this happens, all parents will be given a choice between class times.**


12:00-
1:30


(prerequisite Adv. World Hist 1)
 (August thru May) - $460/yr
Includes all supplies  + shirt


1:30-3:30

(History students who have a sibling in the Farm Fusion class may stay for independent study from 1:30-2:30 when Shakespeare for Kids class in not in session. This will give parents a single drop-off/pick-up time!)

Shakespeare for Kids - TWO 5-week workshops - $225
(Includes books, supplies, & shirt)
Ages 10-12
(Min of 6 / Max of 12)


Wednesday, March 19, 2014

Happy Hatch Day!

What an exciting day!

When the kids arrived to class today, they could hear the sound of tiny chicks!  After a quick preview, I pulled them all together and explained the process by which the chicks make their way into the world.  In the process of learning hatching vocabulary, they learned some very useful general terms:  internal and external.  During lockdown, the chicks align themselves head-up in their eggs.  Then, they "pip" into the egg's air cell.  (This is why having the correct humidity is so important!)  After this "internal pip", the chick can now breathe air.  The chick then makes an "external pip", which is simply a little hole in the shell.  I showed the students many examples of pipped eggs in our incubator.  They learned about the egg tooth, and how it helps the chick to break through.  Usually, the chicks take a little break at this point, but not always.  The next step is for the chick to begin pecking the shell in a line around the top portion of the egg.  This is called "zipping".  The kids in each class were able to watch a chick at this stage of the process.  Finally, the chick pushes the shell open!  I  could not have been more pleased with the timing of our hatch.  The kids each spent lots of quality time watching chicks go through the process.  In all 30 chicks hatched today!
Pipped
Zipping
Welcome, chickie!


After our lesson, the class gathered around and shared their writing assignments for the week.  I know I only see them once a week, and only for 16 weeks out of the entire year, but I think the breaks in between really make their progress with handwriting, spelling, grammar, and reading aloud!

The class then grabbed a snack and listened as I finished reading "Peep in my Pocket".  Junie B. definitely has a way of getting little ones rolling with laughter!   We discussed the animals that Junie B. met in the story, but we especially talked about her fears.  Junie B. was first scared of ponies, then roosters, and finally goats.  We talked about how fears can sometimes be silly, but I took some time to impress upon them that they should always be careful around animals that they do not know!  So often, kids think that all animals (even cats and dogs) are going to be friendly.  I explained that, whether on a farm or just anywhere, you should always ask before trying to pet an animal!

After a little outside time, the class finished up both their felt chickens and their cup/masking tape projects.  They worked hard on them, and it paid off!

The bunnies have all been born, and by the time we meet again for our next workshop, they will be ready to play!  See you in a few weeks for the Bunny Workshop!


Wednesday, March 12, 2014

Candling Day!


Today was an exciting day!  The eggs in the incubator are at day 14… only 1 more week to go! 
We began our day with a farm update.  Since we last met, one of our Netherland Dwarf does had her kits!  They are tiny, helpless newborns right now.  Their eyes are still closed, and they are buried deep in their nest of hay and fur.  We cannot see them yet, but I bred timed their kindling (birth) so that the baby kits would be strong enough to handle for our next workshop.  Of course, the next workshop (right before Easter), is on bunnies!

The kids' seeds that they "planted" in gloves are beginning to sprout.  The goat kids are growing and playing.  The turkeys and guineas are laying, and Daisy the pig has now moved to an outdoor home.  No more piggy jumping up on my bed! 

Next, we began our lesson on eggs.  The class learned about the different animals that lay eggs.  We talked about hard shelled and soft shelled eggs, and discussed the parts of the egg.  The class was able to look at and compare eggs from a chicken, guinea, emu, and ostrich.  Then, we talked about different types of egg farms.  They learned about free-range chickens, compared to confined ones.  They then took an egg from our farm and a typical store-bought egg, cracked them open, and compared the yolks, albumin (whites), shell, and membrane.  They were looked at the different yolk color, as well as the spread of the whites (thick whites do not spread as far as thin ones).  They also each broke off pieces of the shell to compare their strength.  They peeled away the internal membranes, comparing them, as well.  While they made their observations, I explained the importance of humidity in hatching.  If the humidity drops, the membrane dries up around the chicks.  When this happens, we call the chicks “shrink wrapped”.  The chicks are unable to hatch successfully.  Hopefully, all will go well for next week’s hatch, but I prepared the class that things do not always go smoothly!  We talked about the phrase, “Don’t count your chickens before they hatch!”
Guinea, Chicken, Emu, & Ostrich Eggs!

Next, we talked about chicken embryo development.  In order to explain how the yolk provides nutrients to the developing chick, we talked about umbilical cords in mammals.  Then, I explained that eggs are not inside the momma hens!  Because they are outside the body, they need their own source of nutrition.  The yolk is absorbed through the abdomen of the embryo.  By hatch day, the chick is completely developed, and yolk is completely gone!  The class looked at the chicken embryo models, drawing pictures of different stages.  While they worked, I called a few back at a time to candle the eggs!  Each child was able to clearly see the blood vessels, the air sacs, and the squirming little chicks inside the eggs!  We could even point out a tiny chick foot which was pressed up against the shell!

Unfertilized egg
After candling the eggs, the class grabbed a snack and shared their writing assignments.  Using the lesson from “Interrupting Chicken”, the kids wrote stories and explanations on why people should not interrupt.  In one class, a student wrote that if you do need to interrupt, you should apologize.  I was so excited that she pointed this out that I called on students to come up to the front of the class and help me act out different scenarios!  Two children pretended to be adults, deep in conversation.  Playing the role of “the kid”, I ran up and acted out different scenarios.  Once, I actually had something important to say.  I tried running up and blurting it out, as well as running up and beginning with, “Sorry to interrupt, but…”  We worked through many different scenes, which resulted in lots of giggles, but plenty of insight!

After the class read their papers, it was my turn to read!  Instead of my typical short children’s book, I chose to read the first half of Junie B. Jones “Peep in my Pocket”.  The class was thrilled!  Today’s reading brought up many topics to discuss.  Junie B. was scared to death of ponies, and as she learned that ponies are not dangerous, her fear switched over to roosters.  We talked not only about farm animals, but about fear and stress.  We will finish the story next week!

Next, the class finished up their paper-cup-chicken craft.  They should be dry and ready to take home next week!  We also began the 
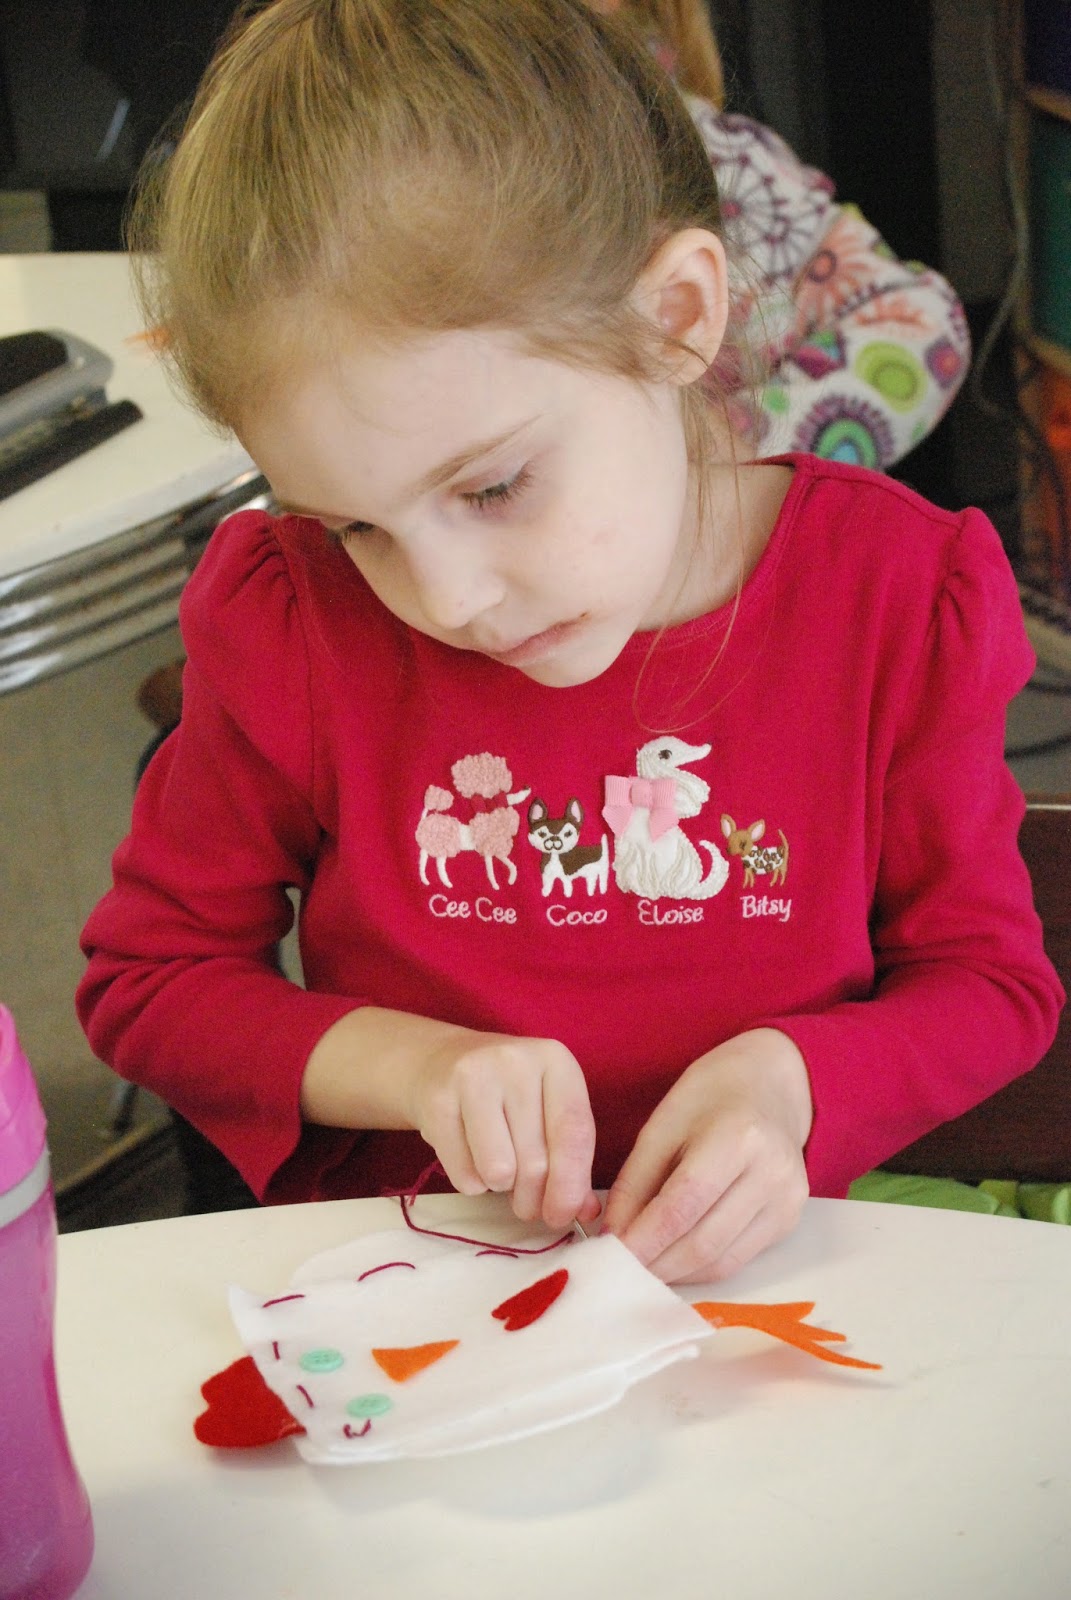
felt pillow animal project for this workshop.  They worked to create little felt chickens.  Next week, they will sew them up and stuff them!  By the end of the year, they will have four little felt animals!  Next school year, I will continue the felt animal projects for each workshop. 


Wednesday, March 5, 2014

Ready for Spring!

Today was a big day!  First of all, our doe had her kid over the weekend, so the class was able to meet all three new baby goats!  The bunnies are (hopefully) bred, and we are crossing our fingers for March bunnies.  Finally, the chicken eggs that the class set in the incubator last week are on day 7 today, which means only two more weeks until hatch!  We are ready for spring!

Although this is our chicken workshop, I wanted the class to be able to help plant vegetables in our raised beds out back.  So, to get ready, the Fayette County Farm Bureau's Women's Committee came and helped the children start the seeds!  They placed damp cotton balls down into the fingers of clear plastic gloves.  Then, they placed their seeds into each finger.  I explained that seeds can sprout without dirt, and that it would help them to see the sprouting process.  One student was quick to point out that she had started an avocado plant in this way!  I love to see those little brains making connections!

After our seed project, we turned our attention back to our chickens.  The class did some mental math to figure out how many days the eggs had left before hatch.  Last week, I explained to the kids that the eggs must be turned 4-5 times per day.  Our electric egg turned does this job for us, but in nature, the mother hen turns them with her beak!  I used models of chicken embryo development for each day that the chicks have been in the incubator.  They all agreed that as of today, the tiny chick looks more like an alien than a chicken!  The class discussed how the embryo develops inside the shell, taking in nutrients from the yolk through the abdomen (like a belly button). 

We all listened as each student read their writing assignment for the week.  They all did a wonderful job of rewriting the story of "The Little Red Hen"!  I am especially proud of each and every one of them for being able to come up to the front of the class, jump up on a stool, and read to their classmates.  They don't realize it, but they are learning public speaking skills!  After they were finished, it was my turn.  I read the story, "Interrupting Chicken" to the kids as they ate their snacks.  We talked about different times people interrupt, and why it is important to try not to (unless there is an emergency, of course!)  

The day started off chilly, but by the time snack was finished, we were able to head out and see the animals.  The students compared the combs, tail feathers, and body structure of the roosters to the hens.  We talked about the different types of chickens, their behavior, and how to care for them.  The kids were also able to meet the baby goats!  We recently disbudded two of them, so the (human) kids were able to see that they made it through the process just fine!  I told the class the story of how my turkey laid her first egg last week... on the roof of the barn!  I showed them where she tried to make a nest, and how the egg rolled down the roof onto some leaves.  Then, I showed them where she made her new nest.  At the back of the barn, under a ladder, she found a little spot to hide away.  We peeked in and sure enough... an egg!  Spring, here we come!


Finally, the class was able to get back to their chicken craft.  They painted, taped, and painted some more.  These little hens are going to be adorable!